How To Draw Cheshire Cat. Since her first book in 1865, Alice and Her Weird and Wonderful Friends have captivated audiences worldwide. Since then, these characters have starred in almost every medium imaginable, including several blockbuster movies. While many aspects of the series are iconic, the smiling Cheshire cat is one of the most recognizable! This distinctive character is almost always seen with a big smile and a distinctive design. It has become an extremely popular character, and many fans enjoy learning how to draw the Cheshire Cat.
This guide will be a real treat for fans of the Alice books and films! Get ready to take a trip through the looking glass by enjoying our guide on how to draw the Cheshire Cat in just 6 steps. You can draw many more characters like bird drawing easy, Anubis drawing, cat drawing, cobra drawing, blueberry drawing, coconut drawing and many more drawing for kids.
Step 1:
As we mentioned in the introduction to this guide on how to draw the Cheshire Cat, he’s probably best known for his broad smile. It seems fitting that we begin this guide looking like this! To draw his smiling mouth, start with a fairly long curved line. Next, draw another parallel line underneath, then connect the two with lines at the corner of the mouth. Then draw a series of lines inside his mouth to make his teeth. Then, in addition to this month, you can draw two round shapes for her eyes and add some pupils. Sometimes the Cheshire Cat’s body disappears, showing only its eyes and mouth, so you can technically stop here! We’ll draw the rest of the body so you can finish off the face with her round nose and some sideburns.
Step 2:
Now that you have drawn its face, you can start outlining the head for your Cheshire Cat drawing in the next step. First, use rounded lines to outline her mouth. We will then use a series of smaller jagged lines connected to this mouth outline for the general outline of his head. You can also add her little round ears side by side on top of her head. Once you have reproduced the outline of your head as it appears in the reference image, you can move on to step 3.
Step 3:
We will begin removing the body in this stage of our focus on how to attract the Cheshire Cat. Use curly lines for his legs under his head on which his face rests. Then you can use more rounded lines for the outlines of his chubby legs below him. Another iconic aspect of this incarnation of the Cheshire Cat design is the stripes all over its body, so you can start drawing some of its paws here.
Step 4:
We can add a body for your Cheshire Cat design in this step. The cat has a broad and chubby body, and we will start with its figure in this part. First, draw a rounded line starting from the side of your head and down. Next, draw a shorter rounded line that starts from his leg and connects it to the wider line you drew for his upper body. Once you’ve outlined the body as it appears in our reference image, you’re ready to add the final details and elements in the next step, so let’s move on when you’re ready!
Step 5:
What would the Cheshire Cat be without its characteristic tail? “Sketchy” would be the solution to that query, and we wouldn’t like that! For this reason, we will add the tail with some final touches in this step of our guide on how to draw the Cheshire Cat. This cat’s tail is big and fluffy, and we’ll keep that precision in this drawing. Start by extending a line from the back of the body and curving it to a point. Then draw the other side of the tail that connects it to the body. Don’t fail to add some round lines along the tail for better lines! This character is often seen hanging from a tree by its tail, so for an added fun detail, you can draw a tree branch and wrap its tail around it.
Step 6:
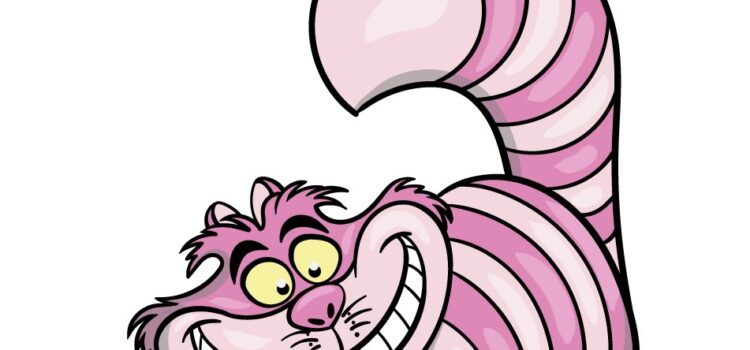
Now we come to the last step of your Cheshire Cat drawing! The version of the cat we’ve drawn in this guide is from the Disney animated movie, and we’ve used the same characters that appear in said movie. This means we alternate a light pink with a dull purple for the stripes to give it a pop of color; we used yellow for his eyes to finish him off. Depending on your preference, you can use these same.
4 Better Methods to Create Your Cheshire Cat Drawing Unique
Make this sketch of the Cheshire Cat even more amazing with these 4 ideas! One way to show off one of the main features of this character would be to remove most of this drawing of the Cheshire Cat! The Cheshire Cat can make most of its body disappear in stories, leaving only its eyes and smile. You could show it by drawing just those aspects, and most people would still know exactly who the character is! If you followed our suggestion above, adding a background might make it even more impactful. There’s a big scene from the Disney adaptation where the Cheshire Cat hangs from a tree.
This would be the perfect frame for this drawing! Of course, the background can be added even if you opt for the full drawing we have done in this guide. You can also choose your favorite Cheshire Cat scene to represent it, or you can create a new background setting to use. What backgrounds could you create for this image? The Alice in Wonderland stories are filled with so many iconic characters. First, there’s Alice herself; then you have the Mad Hatter and the White Rabbit. These are just a few characters you could add to your Cheshire Cat drawing! You can search for these characters online or use the movies to help you.
What classic characters would you like to add to your picture to finish it off? Another thing these stories are famous for is the various quotes and descriptions used by the characters. You can add one or two of these famous lines to your Cheshire Cat sketch! For example, the Cheshire Cat is famous for saying, “We’re all mad here!” This would be the ideal selection to add to your image. You can also opt for many others, and they could help you turn your artwork into a poster. What other quotes could you use?